I came across a YouTube video when searching for tutorials, or information on how to use a LIGHT METER to help with portrait studio lighting.
The video below does just that !
Wednesday, 22 June 2011
Thursday, 16 June 2011
Portrait Lighting information
I've recently signed up to a studio Portrait Lighting course, and the next few blogs will serve as my quick notes each week.
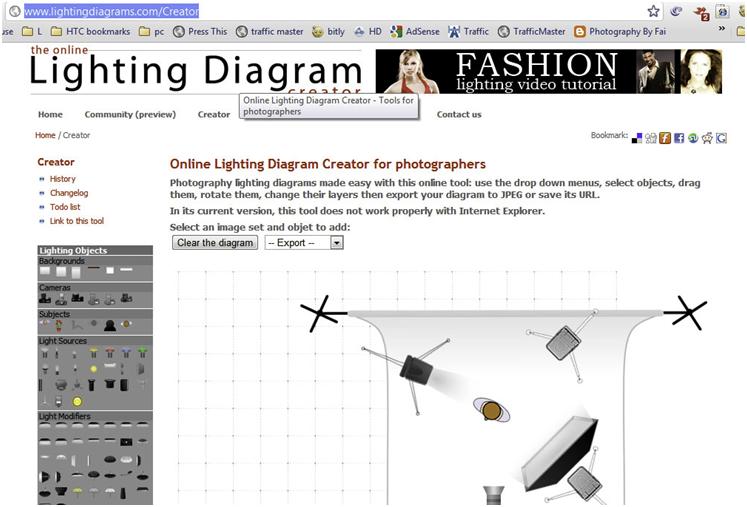
Flickr Group discussing online Lighting Diagram Creator:
http://www.flickr.com/photos/qhphotography/3546392515/
Lighting Diagram Creator
http://www.lightingdiagrams.com/Creator
Portrait Lighting - Broad
20110614 – Broad lighting

During this session, we threw together the setup as shown above.
This three light setup consists of:
- The first light is a key light.
Usually this is the strongest light and this light sets the lighting of the scene.
We used a medium softbox camera-right, set at half power.
- The second light is called a fill light.
This light helps fill the shadows that the main light casts.
This was behind the subject, camera-left.
- The last light is called a backlight (because it comes from the back), and is used to create a contour and separation.
It is common to use a snoot or a gridspot on the backlight to avoid a spill.
We actually just used a flash-head from high up, with some small directional cone...(unsure of name).
An interesting webpage to read might be:
http://www.diyphotography.net/3-point-lighting-technique
A great video on YouTube is:
http://www.youtube.com/watch?v=uH84-pA7p-c
The video discusses:
- Rembrant – signified by triangular highlight on models cheek, light is 45 degrees off centre, infront of the model, camera left
- Butterfly – signified by the butterfly shaped shadow under the models nose, glamorous in appearance, the light is 90 degrees off centre high up pointing downwards
- Edge – this is very dramatic, light is the same height as the model, at 0 degrees to centre (same plane as the model)
Thursday, 9 June 2011
20110529 Rob and Sophie Oakes
20110529 Rob and Sophie Oakes
I had the pleasure of attending the beautiful wedding of Rob and Sophie on 29 May 2011 at Wincham Hall.
My pictures from the gorgeous day are now on Photobox for you to enjoy.
I had the pleasure of attending the beautiful wedding of Rob and Sophie on 29 May 2011 at Wincham Hall.
My pictures from the gorgeous day are now on Photobox for you to enjoy.
Don't forget, you can buy these pictures from Photobox also.
A quick update - Rob and Sophie even used my images for their thank you card, that put a giant smile on my face.

Thursday, 2 June 2011
25 Photoshop shortcuts

Photoshop keyboard shorts to make life easier.
http://psd.tutsplus.com/articles/tools/awesome-keyboard-shortcuts-photoshop/
"shortcuts its like peanut butter for nerds"
1. Drag-Zoom
Command/Ctrl + Space + Click and Drag Left or Right. Fastest way to zoom in and out with one keyboard shortcut (only in CS5 and only with GPU enabled).
2. HUD Color Picker
Alt + Shift + Right Click (Win) or Control + Option + Cmd + Click (Mac). Gorgeous color picker with a color wheel (only in CS5 and only with GPU enabled). Preferences are under General tab.
3. Bird’s Eye View
Hold Down H + Click, Reposition View and Let Go of the Mouse to Zoom Back). Works great with large images, when you need to work closely. Fast way to fit the image to screen and then zoom back into another area with the previous zoom ratio quickly.
4. Brush Size & Hardness
Ctrl + Alt + Right Click (Win) or Control + Option + Click (Mac). Drag your mouse to right/left to change the size and up/down to change the hardness. It only works with CS5 in both directions. In CS4 only the size change works. You can change the color of the brush preview under Preferences/Cursors. You also need GPU turned on under the Performance tab to be able to see the brush preview.
5. Draw Straight Lines
Hold Down Shift. Works with nearly every drawing tool.
6. Move
Hold Down Command/Ctrl. Fastest way to move something quickly and then switch back to the previous tool.
7. Pan (Shift + Space) and Zoom Simultaneously in all Documents
Shift + Ctrl + Space (Win) or Shift + Command + Space (Mac). Best way to compare or work on more than images at the same time.
8. Hide Panels
Hit Tab. You can always show them again by pressing Tab once more, or just simply hover over the edges to show the panels and toolbar temporarily.
9. Full Screen Preview of Files From Mini-Bridge
Space and Then Arrow Keys. It works the same way as in Bridge. Make sure that you deselect the images in MiniBridge or collapse the panel when you continue working in Photoshop.
10. Text Size
Command/Ctrl + Shift + . or , you can use it for selected text. It won’t work by only selecting the text layer.
11. All Caps for Text
Command/Ctrl + Shift + K. Quick way to switch between lowercase and uppercase text. Make sure you type without Caps lock to be able to use this.
12. Tracking and Kerning
Alt/Option + Left and Right Arrow Keys. Useful way to make equalize the distance between characters. If you select a word, a line or a whole paragraph then you change the Tracking. If you click between two characters you change the Kerning.
13. Leading
Alt/Option + Up and Down Arrow Keys. Quickly change the distance between selected lines.
14. Baseline Shift
Alt/Option + Shift + Up and Down Arrow Keys. Easy way to use one text layer but have different positions for the text.
15. Fill
Command/Ctrl + Backspace – Foreground Color, Alt/Option + Backspace – Background Color, Shift + Backspace – Fill Options. Great way to fill color into selections or change the color of text and vector shape layers.
16. Reset Any Dialog Box
Alt/Option + Click on Cancel. Instead of canceling a dialog box and returning to it try Reset and save time and effort.
17. Changing Opacity and Fill Opacity
Numeric Keys, Shift + Numeric Keys. This will change the opacity and fill of the selected layer (or even more than one layer at the same time in CS5) and it will change opacity and fill of the tool if you select a drawing tool.
18. Invert Colors of Selected Layer or Layer’s Pixel Mask
Command/Ctrl + I. This is a fast way to invert visible parts of a layer if you invert the colours of the layer mask.
19. Switch to Precise Cursors for Drawing Tools
Hit Caps Lock. If you don’t want to see the edges of the brush you can switch to precise mode easily by having Caps lock on.
20. Reset Preferences
Ctrl + Alt + Shift (Win) or Command + Option + Shift (Mac) When Loading Photoshop. If you want to start with the default settings and user interface hold down these buttons while Photoshop is loading.
21. Switch Foreground/Background Colours
Press (X). Fast way to switch between the selected colour.
22. Mask View
Alt/Option + Click on a Layer Mask. Great way to clean up the mask after you save it from a selection. Using it again will switch back to normal view again.
23. Disable Mask
Shift + Click on a Layer Mask. You can quickly show the original contents of the layer with this keyboard shortcut. Using it again will enable the mask again.
24. Intersection of Selections
Alt/Option + Shift + Click With a Selection Tool Over Another Overlapping Selection. Easy way to keep only a specific part of a selection.
25. Merge All Visible Layers to a New Layer
Ctrl + Alt + Shift + E (Win) or Command + Option + Shift + E. If you want to keep all your layers but you also need to merge them together to be able to use something you can convert them all into one Smart object or use this keyboard shortcut to make a duplicate merged layer.
Bonus (Easter-Egg) Keyboard Shortcut
Alt/Option + Click on Panel options under the options of Layers panel.
Subscribe to:
Posts (Atom)